Wednesday, September 24, 2014

Buzz Saw Quilt

I actually finished this quilt day before yesterday, but got busy working on another quilt and forgot to do a blog update.
 This quilt measures 100"x 100"....a very good size for my bed.

 I have named it Buzz Saw....I kind of just made up the design as I went along. I started with large squares. I think I used 10" squares. I placed a print and background square right sides together, drew a line diagonally from corner to corner and then stitched 1/4" either side of that line. Then cut on the drawn line, ending up with 2 Half Square Triangles, which I then cut into four sections. Mix them all up and sew the blocks. I then added an extra 2" strip to one side of the block quarter. Then rotate each block quarter and sew 4 into the larger block. I'm sure there is an available pattern out there somewhere for this quilt, but I like to just wing it and do my own thing.
  I used all my border fabric so I don't have enough for binding. I used the red print that I used for the narrow inner border to make my binding.

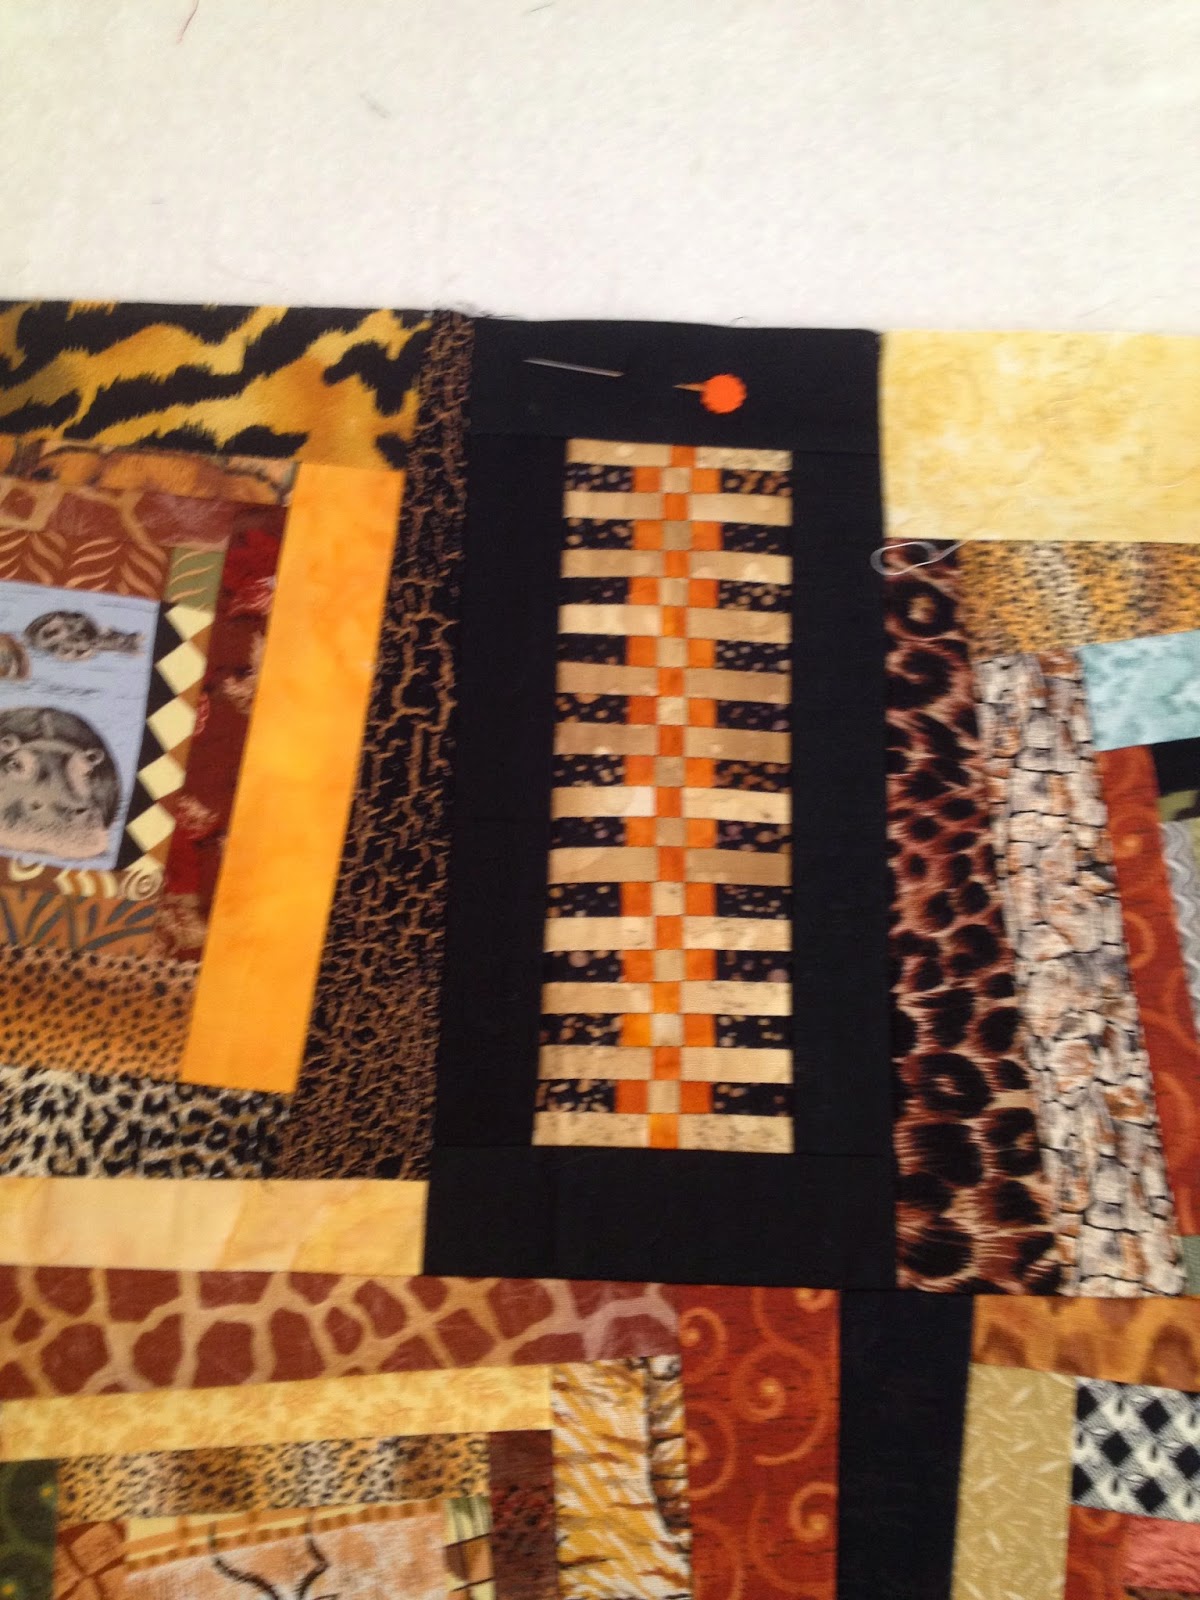
I also made pillow shams to match the quilt....this is the first time I've ever made pillow shams to go with a quilt. I'm not too sure what prompted that decision. LOL
Here is a picture of one sham hanging on my ironing board.


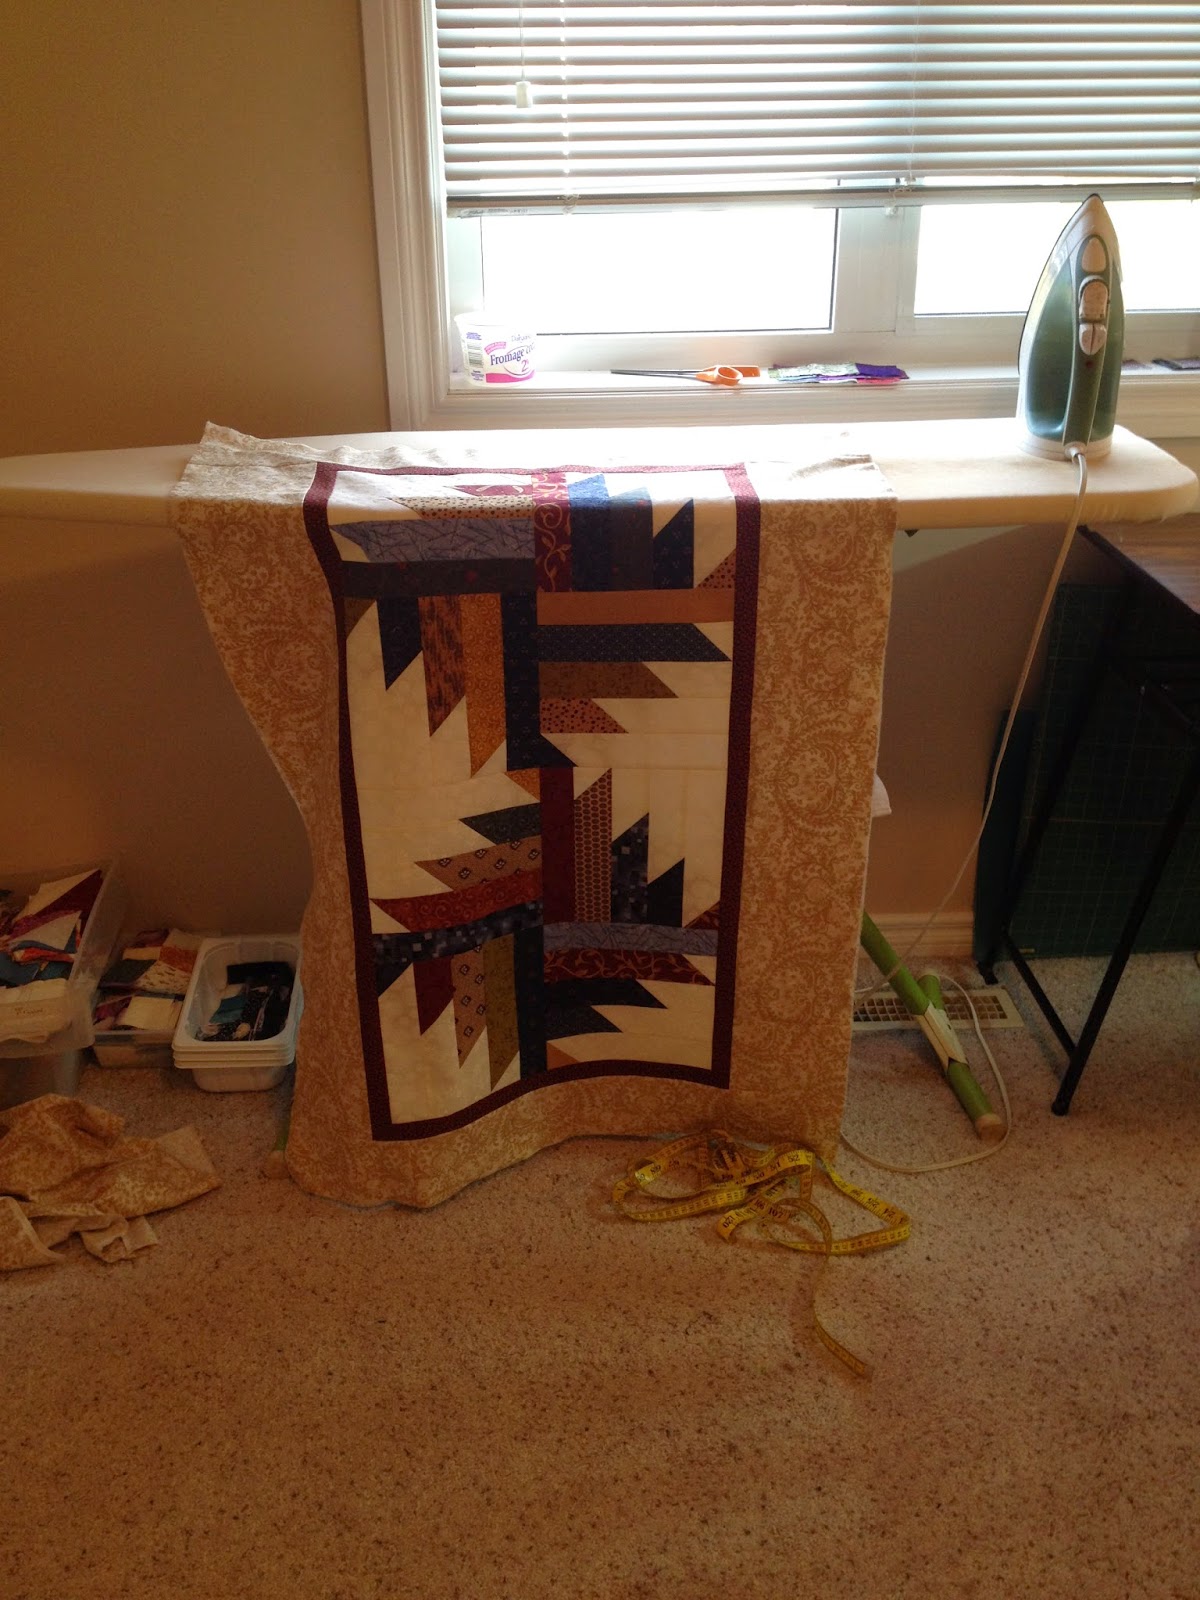
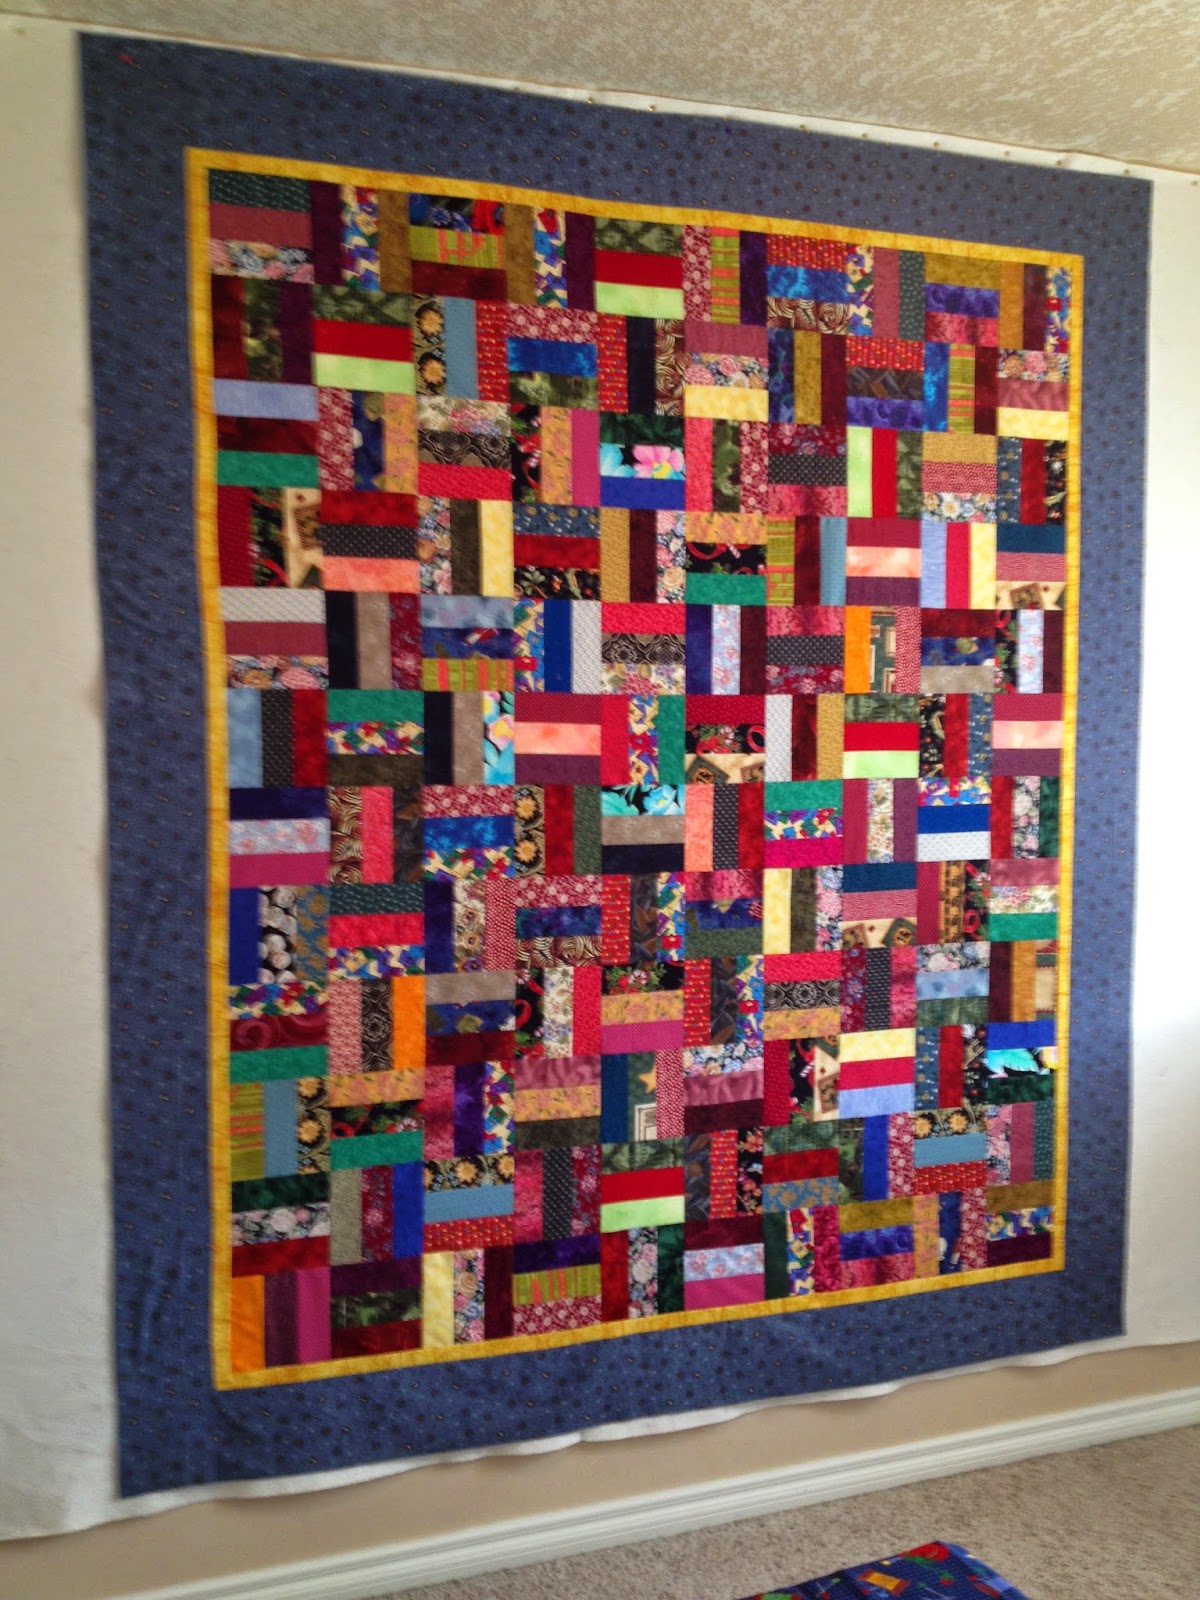
I don't want a pieced backing on this quilt and I have no wide backings in my stash, so I will wait to find some on sale in the future. I will use that same fabric for the pillow sham backs as well. I think I will also make piping for the pillow shams from my binding I have already made.
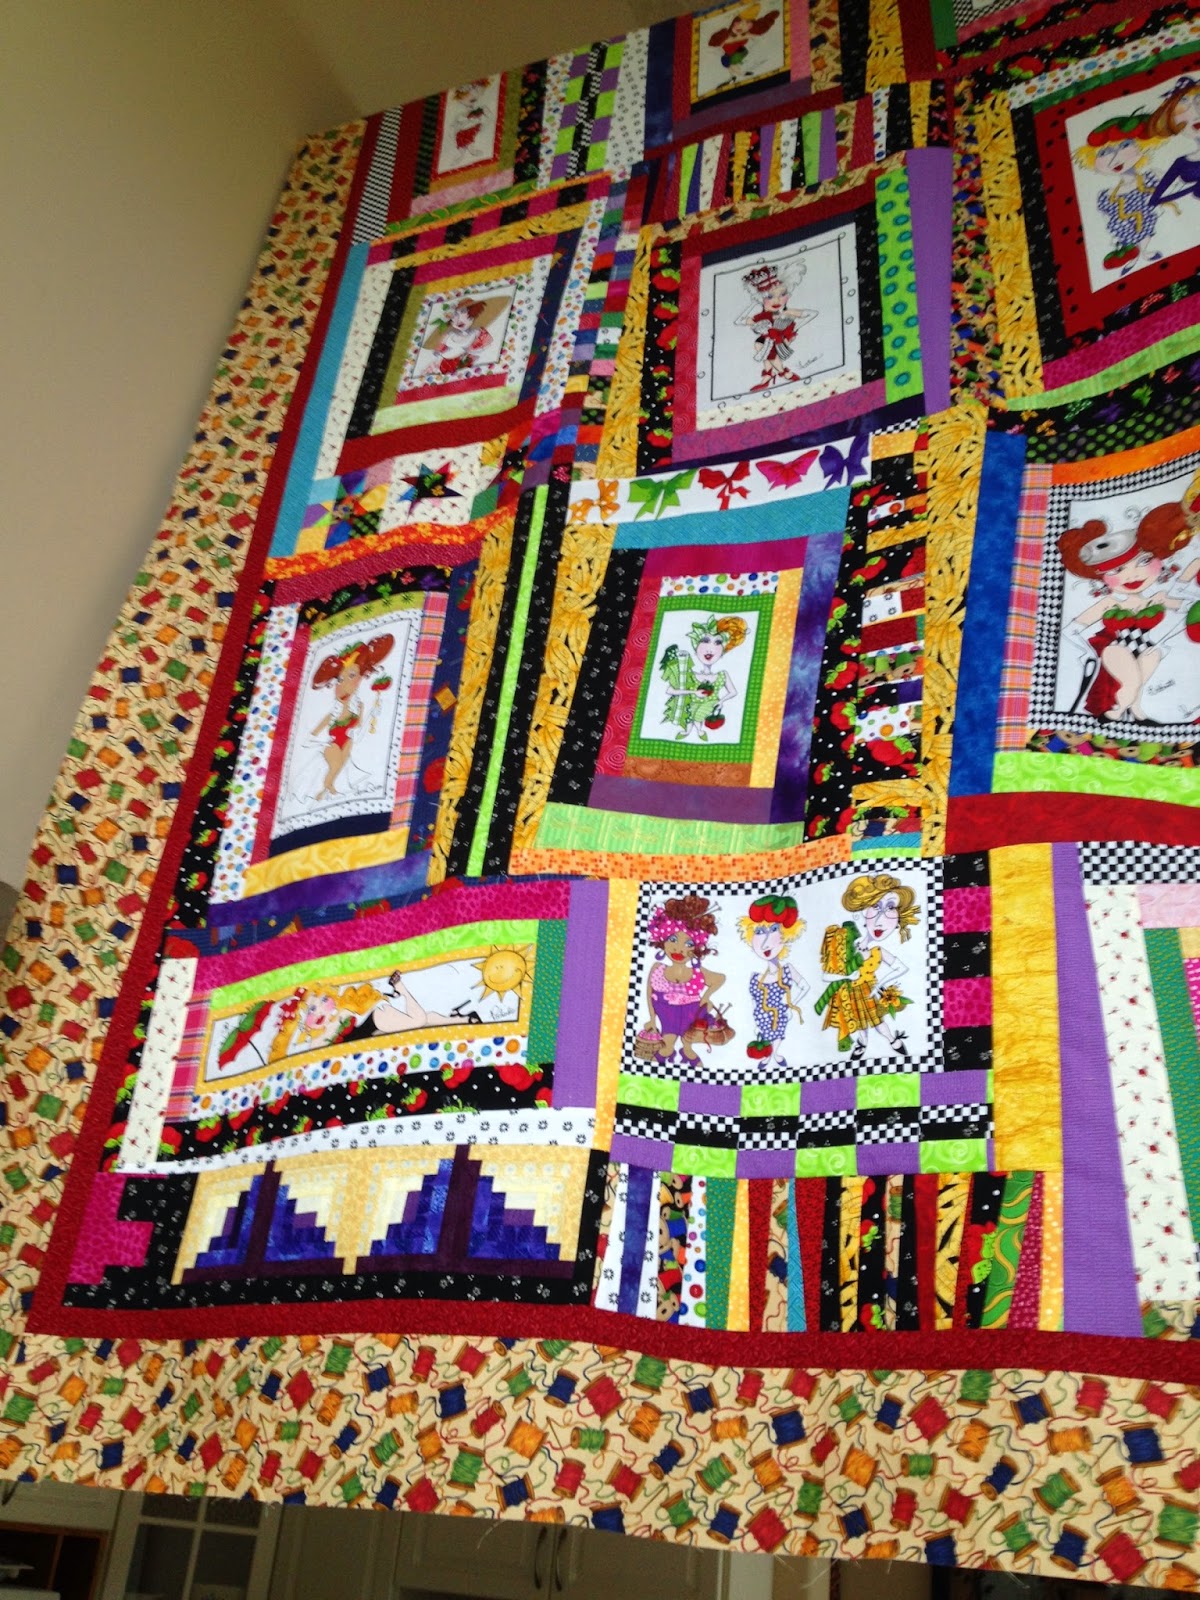
So quilt top is pieced, binding made, shams pieced and it's hanging in my quilt closet awaiting backing and to be quilted.
This makes "quilt package" number 12 of my intended 30 for my personal challenge before March 31, 2015.
I am making great progress and think I will complete those 30 "quilt packages" long before my deadline.

One thing I have been concentrating on the past few weeks is that when I pull a UFO project out and put it up on my design wall, I am determined to finish it and not put it away again until I am done.
I am feeling a great satisfaction completing these projects!
And I have realized I have WAY MORE projects on the go than I originally thought!
I have unearthed lots I had forgotten about.

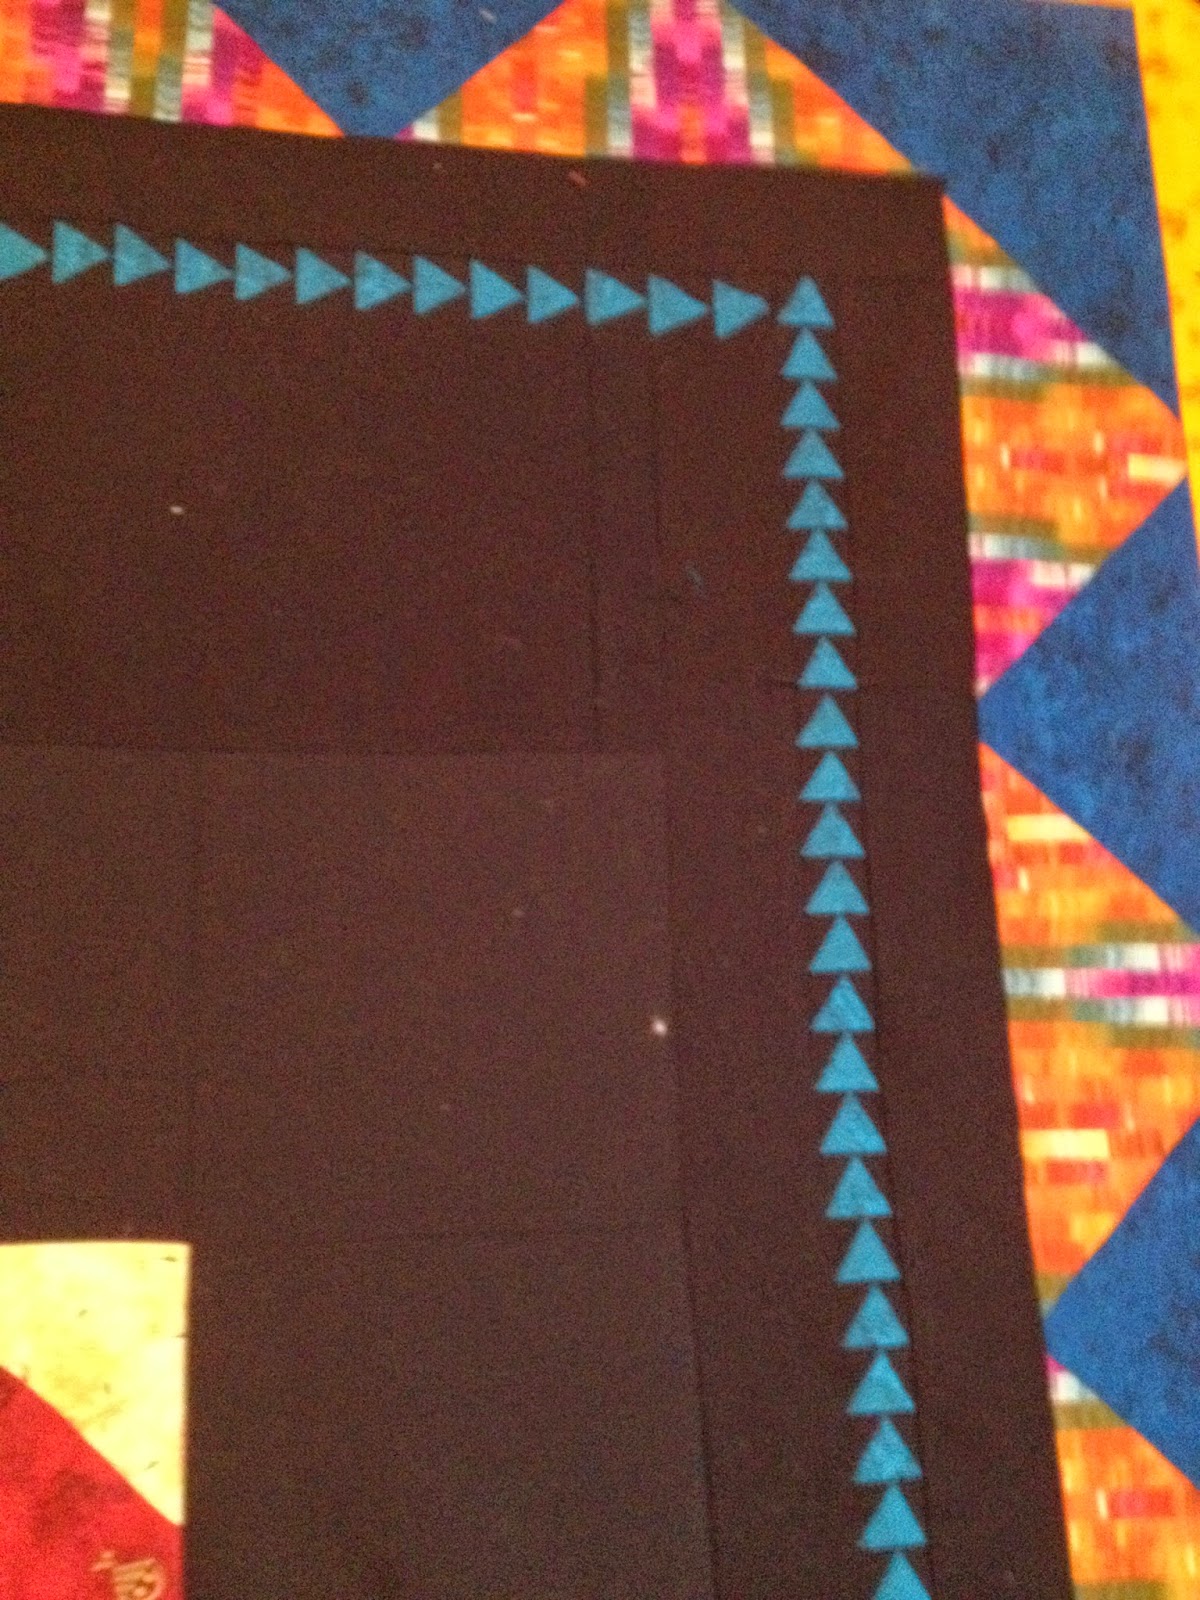
I am working on a batik quilt now.....and I have named it "What Was I Thinking!!!!!" LOL
It is a Garden Maze design....I will post it tomorrow and you will see why I keep asking myself that question not only when I pulled it out but repeatedly while working on the quilt. LOL

I have it to the border stage now. I'm hoping I can finish it tonight.

Quilty Hugs, Wanda

Sunday, September 21, 2014

Continuing My Quilting Marathon.

The next project I dug out of my UFO bin was this Round Robin Quilt. For many years I participated in Round Robins with a group of 6 gals online. We would each make a center block and send that block to the next person on the list. When we received someones block we then put a pieced border around their center block and sent it on to the next person down the list so that they could add a border....and so on and so forth. Six months later I received my completed top back in the mail. What a lovely surprise when I opened up this beauty!!!!
 Some close up shots of some of the details in this quilt. There is lots of paper pieced designs and I just love it so much.


This is my center block that I made and sent off to the gals to work their magic.


See those little triangles in this border. I think they finish at a teeny tiny 1".
Amazing work these gals accomplished.


All this quilt needed was backing pieced and binding made. I found a nice black print in my stash and had those done in no time flat.
This one is all ready for the long arm machine.


I then dug out this top. I had the center pieced and all it needed was borders added, backing pieced and binding made. I got the borders and binding done last night and got up early this morning and pieced the backing.
This is a free pattern on Bonnie Hunter's site....www.quiltville.com
It's called Bricks & Stepping Stones. It makes up very quickly.


My count of completed quilt tops, backings and bindings is at  11 now.

I had challenged myself to complete 30 tops in 30 weeks.
I am in week 6 now and way ahead of the game. 
I have been working very hard.

This is really amazing to me as I had lost my quilting MoJo four years ago when I went through a divorce and in the process lost my long arm machine and my business.
I was unable to even look at my quilts for most of those years as I grieved those losses. 
But I am happy to say I have found my MOJO again and I am having so much fun spending time in my quilt studio. 

Quilty Hugs,
Wanda

WILD & WONKY SAFARI QUILT

Whew, I have been on a roll. I thought it was time I came up for a breath of air and did a Blog Report.
I finished piecing the top for my Wild & Wonky Safari Quilt.

This blog post is photo heavy!!!

Here is what it looked like when I dug it out of the UFO bin. Lots of blocks pieced and a couple rows sewn together.

 Beside the blocks on the design wall you can see all the "fillers" I plan to use in the quilt.

Most of these "fillers" are leftovers from a Seminole Wall hanging I made a few years ago as a class sample.

I never throw anything away as I know at some point in the future it will be the perfect thing I need in a quilt.

 Here is a close up photo of a few blocks, leftover seminole fillers, and poverty piecing.


More blocks and fillers, seminole piecing leftovers.


Another seminole strip that I framed in black because it wasn't quite big enough.


The finished quilt top!
I happened to find a batik in my stash that worked great for borders. 

Here is the very technical way I figure out borders. :)
Determine the measurements of my quilt center. 
Add up these numbers....width x 2 + length x 2=border length needed. I generally add an additional 20 inches to this number to account for the extra I will need because once I put on my side borders then I have a larger measurement needed for my top & bottom borders. Easy math.
Take that final figure and divide it by 40.....because most fabric is about 42" wide and I allow for trimming off selvages.
The answer you get is how many strips cut across the width of your fabric you will need to cut for your borders. 
 In this case I needed 8 strips.

Measure how much fabric I have......I happened to have just a smidgen over 40 inches.
Divide 40" by 8 (number of strips I needed).
I could get eight 5" strips from the fabric I had.
So my quilt got a 5" border. DaDa.


The borders look a little wonky, but I think it is just the way I have it on my design wall. I'll fix that when quilting it.

Some close up shots of the finished quilt top. I really love this quilt.
 This quilt will get a black binding.
The backing and binding are already made and the entire "quilt package" is hanging in my quilt closet ready to go on the longarm machine.

I've gotten lots more done in the past few days, but I will do a separate blog post for each quilt. Just so this one isn't too long.

Quilty Hugs, 
Wanda

Thursday, September 18, 2014

Lessons in Values

What a learning experience quilting is to me. Every  time I make a quilt I learn something new.
This Pink & Green quilt (I'm not even sure what to call it). I decided to just name it Lessons in Values.
I had started this quilt in 2001 because I got this idea I should make a pink and green quilt. I like scrappy quilts so chose lots of different pink and green fat quarters.


 I got this far with the quilt and for some reason I put it away in the growing UFO pile.
I had an AHAH moment while working on it the other day.
I HAD NOT PAID ANY ATTENTION TO THE VALUES OF THE FABRICS I HAD CHOSEN!!!!


I realize if \I had paid attention to my value placement that my stars would have stood out more when looking at the quilt.
I don't like this quilt very much.
I just wanted to rip it all apart and start over again. But then I thought it would take me less time to start another quilt from scratch and be more aware of my value placements of fabrics.
Live and learn.


 I decided to just continue sewing the blocks together.
Finished is better than perfect....right?
 It is done now and ready for the longarm machine.
I couldn't find a large enough piece of fabric in my stash for the back, so I took all my leftover fabrics from the front (I did not want another pink and green quilt anyway!) and just started sewing them all together.
I didn't take a photo of the backing. You will have to wait until the quilt is complete and I will take one.
Before piecing my backing I made my binding....everything else went into the backing. 
Even this random Carpenter's Wheel block I found in the bag with this quilt.
I used a few left over blocks from the front as well and sewed up all my left over strips into checkerboard strips and inserted those here and there. 


I'm glad to have this one moved further along in the process of thought to completed quilt. 
The quilt measures 76" x 94".
Done, Done!!!

Quilty Hugs,
Wanda

Monday, September 15, 2014

A Scrappy Mish Mash!

This is the UFO top I posted about yesterday morning.
At first I planned a HST border and I worked on it for hours! 
But once I got 2 side borders done I didn't like it with the quilt and they weren't playing nice! My measurements were all off and the borders didn't fit.
So I pulled them off the design wall, folded them and put them away!!!
I had some String Blocks I had been working on and thought I wonder how those would look....I had almost enough to go around the quilt. I think I had to make 4 more.
Then what to do with the corners? 
My string border was cut at 6", so finishes at 5-1/2".
My HST blocks in the quilt top finished at 6" so they were 6-1/2" unfinished.
I solved that problem by trimming down my HST units and squares to 3-1/4" instead of 3-1/2".
Everything just fit perfectly and I got up early this morning and applied the borders, pieced the backing and made the binding. 
All are hanging in my quilt closet waiting to go on the longarm. Nice.


I went digging in my UFO's this morning and unearthed this. It was all packaged up in a large bag with all the fabrics I was using and some more pieced blocks that are currently sitting on the floor beneath the design wall. 
I remember starting this in 2001 and I remember thinking I don't really like pink and green quilt. LOL
So I lost interest and put it away.
Time to resurrect it and get it completed. 
Actually in the photo I think it looks very nice. I just might find I do like it after all after I have gotten it a little further along.
This is one of my own designs. I obviously like the blocks as I have another quilt I made 7 years ago with the same blocks.
 A close up of the blocks.

 This Carpenter's Wheel block was also in the bag with the other quilt. It's made with some of the same fabrics.
Wonder what my plan was for that?
Carpenter's Wheel is one of my favorite blocks and I think there just might be another quilt in my future using this block. Interesting!!!!

Well, it is just after 9:00 am. I am off to spend the day with my Dear Mom.

Quilty Hugs to Everyone.
Wanda

Sunday, September 14, 2014

Another day, Another UFO.

I don't like having an empty design wall in my quilt studio, so this morning I went to my box of UFO's 
(unfinished objects, in this case, unfinished quilts).

This is what I pulled out. I don't remember making it, don't know when I made it, but I know I did the work as I recognize some of the fabrics from previous projects.
I was obviously using up left over parts. 
This quilt top is made up of Rail Fence blocks, Half Square Triangles, 4 patches. 
Can't say I love it....probably why it got shoved aside and forgotten.
I think I will just add borders and call it finished. 
I will post the finished top as soon as I am done it. 
There is always the chance this will turn into an amazing work of art. LOL


I'm off to contemplate borders.

Quilty Hugs,
Wanda

Saturday, September 13, 2014

Quilts are just like Sour Dough Starter!

I was thinking about this. Quilts are like sour dough starter. 
I start with an idea for a quilt. 
I make that quilt and I always have block parts, blocks, strips, fabrics left over. 
So I put my thinking cap on and come up with a plan to use up those left over parts. 
I pull from my fabric stash, add a few more fabrics...just like making "sour dough starter" and soon I have another quilt.....with more left over parts!!! 
And so it goes. One quilt leads to another which leads to another, which leads to another.

Day before yesterday I was looking through my strips bins. 

My 2-1/2" bin had been well used but there were a bunch of strips in there that I call my "nasties"! 
Scraps from clothing I made in the 80's and 90's. Christmas prints, large florals etc.
 I didn't like them, some of them were really old and I wasn't using them in projects. 

So I decided to just take them all out and use them up in a Rail Fence quilt. 
I figured the worst that could happen was I'd not like the quilt and would then donate it.

Three strips sewn together measured 6-1/2", so I cut blocks that size. I needed 120 blocks for a throw size quilt.
Any strips sets that were too short to cut 6-1/2" blocks I cut into 2-1/2" units to make 9 patch blocks.....sour dough starter again. LOL
My next quilt will use those 9 patch blocks.

I finished up the  "Sour Dough Rail Fence" this afternoon. Backing is pieced and binding is made....all ready to quilt. 
Wow, I feel good. A completed flimsy in 2 days and I used all those "nasties" up!
And the quilt looks pretty good and I really like it. Imagine that!!!!

 I used a Debbie Mumm fabric for the outer borders.

But see that inner yellow border? 
When I opened up that fabric I found cat hair on it! I haven't owned a cat in almost 14 years. LOL 
Moldy, oldy!
Maybe I should call this quilt "Memories of MoJo". That was my cat's name.

 Here are the completed blocks up on the design wall before I started webbing the top.


I am very happy with this quilt. It measures 75" x 94". 
Sometimes simple is best I think. 
KISS 
(keep it simple silly).

Quilty Hugs,
Wanda


Friday, September 12, 2014

The Wandering Quilter is Back!

It has been so long since my last blog post. But I have not been idle.
After finishing my Lattice Stars Quilt, I dug out my Quilty Gals. 
You know those printed panels that we all love. The printed blocks are never on grain, but I love them so much. 
I had bought about 3 different fabrics lines with a quilting/sewing theme. I had cut out all the blocks with the quilty ladies and then set them aside a few years ago. It was time to resurrect them!!!!

I started by sewing 3 rows of strips to the wonky blocks.....courthouse steps style. My first row was 1-1/2" strips, second row 2-1/2" strips, final row 3 strips. 
I then "wonked" the blocks by twisting them either left or right and cutting off a narrow wedge shape from each side. 
Here are some of the blocks hanging on my design wall.
 More Blocks! 

 This is my favorite block....don't you just love the buttons for her bra. 


 I pulled lots of strips from my strips drawers to add to this quilt.
And like I often do I sewed way too many blocks.....I have enough left over for 2 more quilts.
 Hmmmmm.....I happen to have 2 sisters and although they resisted this crazy quilting bug for many years guess what? 
They are now both quilting. In fact my one sister bought herself a Grace quilting machine recently.

So after a few days getting my blocks to this stage I had to take a break.
My sister was going on vacation, and as she is the primary caregiver for my mother, I went to stay with mom while she was away. I was gone 8 days.
While there I worked on Spider Web blocks.....lots more work to do on those.
I also worked on a few blocks for my Dear Jane quilt.....that project has been in the works for 15 years and I still have a long way to go.

After returning home on Tuesday I went to work on my Quilty Gals quilt again.
Made lots of filler strips....those are so much fun to do. I put a lot of Seminole piecing in this quilt.
I also take the trimmed off wedge shapes from wonking the blocks and sew them together......what I call "Poverty Piecing". Then I use those as some of my fillers.
I love making these Wonky quilts. Another term I use for these quilts is "Barely Square" as those pre-printed panels are never printed on grain and are barely square. LOL

Here are the blocks on my design wall with some fillers added already. I had the first 3 rows sewn together at this point. This is a very colorful, busy quilt but I just love it!


 My original idea was to put a border of Spool Blocks as a second border.....but the quilt was just getting huge so I scrapped that idea. I ended up just using a 1" narrow border of red, then a 4" outer border. 
The quilt was too big to photograph on my design wall, so here it is hanging over my loft railing. The quilt measures 86" x 94". 


Look at those log cabin blocks....those are leftovers from a round robin quilt border I did years ago.....using up left overs is one of the things I love about these quilts.

See the Poverty Piecing strip beside the log cabin blocks....don't you just love it? 


More Seminole piecing strips....the black/purple/green strip is a fun one to make. I love, love, love Seminole Piecing!!!!
Well, this Quilty Gals quilt is now a finished flimsy.....still have to sew the backing and binding and it will be ready to quilt.

Today I'm having an easy day.....sewing rail fence blocks from all my left over 2-1/2" strips.
Quilty Hugs,
Wanda